
G’day Goonhammer readers! We had the pleasure of participating in our local two-day Kings of War tournament event, ConVic 2023, and we can already say it was a great time. Urr took his Aztec-theme Varangur, and Cytoplasm his Mantic Undead. There were highs, there were lows and there were 1970’s priced beverages, but for the details you will have to read on.
What is ConVic 2023?
In the snobby, coffee capital that is Melbourne, Australia, there is but one two-day Kings of War tournament a year. Held in a spacious lawn bowls club complete with a licensed bar and kitchen, it is almost like another home.
The tournament was six rounds of 2150 points across the two days. An interesting selection of scenarios were chosen, including Fool’s Gold (one of the bluff token scenarios) and Kill (the killy scenario).
ConVic 2023 also had two unique rules; pre-game terrain movement, and the Burden Bowls Blessing Token. All terrain was pre-mapped, but players could roll-off to move a single piece of terrain up to 6 inches. Move a hill into a deployment zone for war engines, or move a forest to make room for your army. The Burden Bowl Blessing Token allowed for the re-roll of one Nerve test during the event, and required an impassioned plea for aid from Lady Burden (the token saint of the Burden Bowls Club). Together these made the event particularly fun, with no table the same, and cries to fictional patrons throughout.
The Varangur Contenders
1 x Clansmen Horde – Norj-Bik, Sir Jesse’s Boots of Striding
3 x Night Raider Regiments
2 x The Fallen Hordes – Brew of Strength, Brew of Sharpness
2 x Snow Foxes Regiments
1 x Magus – Lightning Bolt, Bane Chant, Crown of the Wizard King
1 x Magnilde of the Fallen
1 x Snow Troll Prime
1 x Lord on Chimera – Staying Stone

This is a bit of a deviation from my usual setup, but I’ve been playing it, or a variation of it, for a while now, so I’m confident with how it plays. As the points level is a bit unusual, there’s same changes, but at the core, it is still the two Fallen Hordes, with items to beef up their hitting power. We’ve also got the Snow Foxes, to act as chaff and objective grabbers. Magnilde is in for her hitting power, speed and Inspiring. This is where we get a bit different. Three Regiments of Night Raider to add some ranged punch, and they’re not too shabby in combat either. And I spent all my hobby time up to the event getting them painted, so there was no way they weren’t making it into the list. A Horde of Defense 5 Clansmen provide a big block of hard to shift nerve, and the Boots of Striding let them get off a bit hit as well, especially backed up by a Bane Chant Magus, again with Crown of the Wizard King to help spread the threat of that Bane Chant. There’s just a regular Snow Troll Prime instead of Kruufnir, that was just for points. Lastly, we have a Lord on Chimera. This was a bit of a toss up before list submission. I ended up going for it, mostly because I am very happy with how I’ve painted the model I used for it. It turns out well that I did, there were quite a lot of Dragons at the event, and having one of my own helped me keep up.
This is by no means an optimal Varangur list, The Fallen are just too expensive, and don’t hit hard enough without items. With the items, if they get unlucky and fail a roll, it hurts real bad, as there is not quite enough left in the rest of the list to recover. When lists dropped, it did sting a bit entering the competition with a less than optimised army, so I had made my peace with not going positive with my win rate. Let’s see how it all went.
Cytoplasm’s House of the Fundead
The Undead army ended up with a few more hammers than my earlier iteration, namely the Soul Reaver Infantry I managed to paint and base leading up to the event. The army isn’t exactly fast, but the idea is the pressure from being hit by Balefire Catapults will force my opponent into action and make some mistakes.
3 x Zombies (regiment)
1 x Skeleton Spearmen (regiment)
1 x Wraiths (troop)
2 x Soul Reaver Infantry (regiment) one with Staying Stone
1 x Wights (horde) with Blade of Slashing
2 x Revenant Cavalry (troop)
1 x Soul Reaver Cavalry (regiment) with Sir Jesse’s Boots of Striding
2 x Balefire Catapults
1 x Revenant King with Surge (5)
1 x Revenant King on Undead Horse, with Trickster’s Wand (Hex 2), Surge (5)
1 x Necromancer with Inspiring Talisman, Heal (3), Bane Chant (2)

Round 1 – Salt the Earth
Urr’s Varangur vs Alex’s Basileans
1 x Elohi Regiment
2 x Elohi Horde – 1 x Celestial Fury, Brew of Strength, Brew of Sharpness
2 x Gur Panthers Troop
2 x Paladin Knights Regiment - Sir Jesse’s Boots of Striding
2 x Heavy Arbalest
1 x War Wizard – The Boomstick
1 x Ur-Elohi – Blade of Slashing
1 x Jullius, Dragon of Heaven
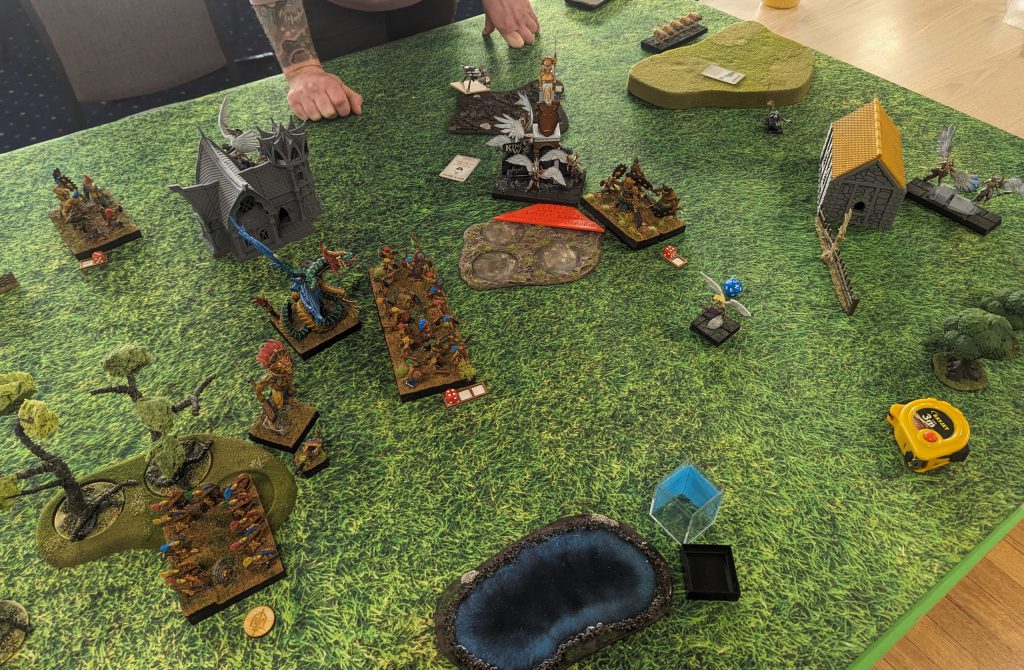
Going in, this is a scenario that I want to be playing these Basileans on. I deploy all the tokens I can towards the back of the board, and just behind terrain, having learnt that I can sit my Night Raiders on the tokens. They can contribute to the game with their shooting, while Alex only has Gur Panthers to hang back, everything else with Unit Strength wants to be up in the fighting. While the Arbalests are kind of scary, I just don’t want them hitting Fallen or the Chimera, everything else is fine. My shooting has the volume, and I want to use it to clear the chaff, then target those Defence 4+ Elohi. As for the rest of the army, the Knights are the same speed as the Fallen, but hit much worse once terrain gets involved. Jullius is scary though, I have to make sure he can’t come zooming down and turn a flank. From the excitement, I forgot to take photos of deployment and Turn 1.
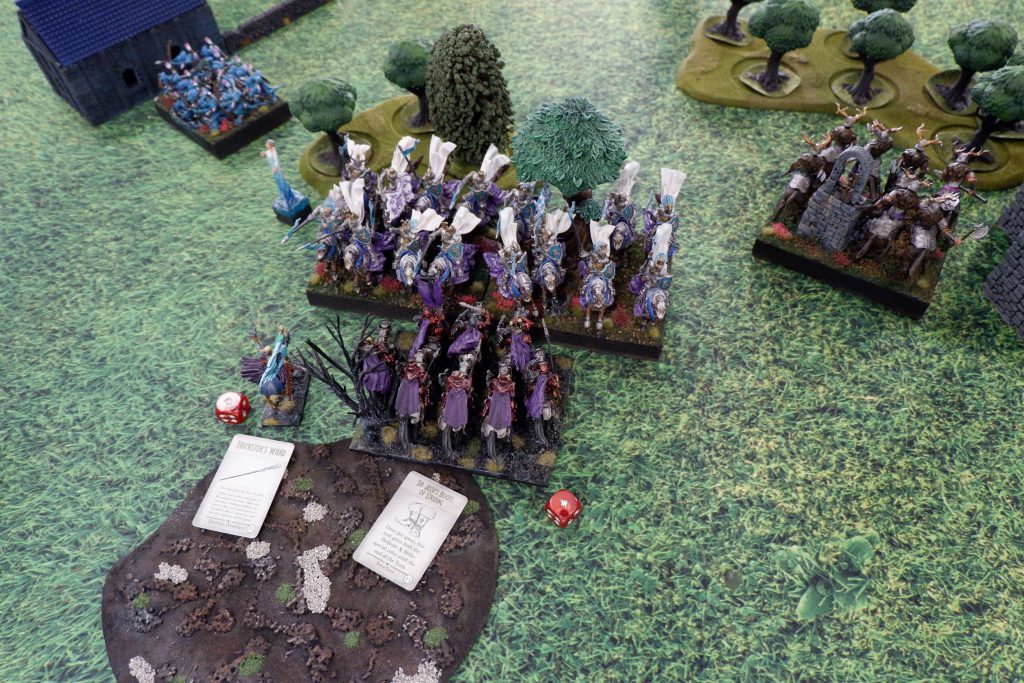
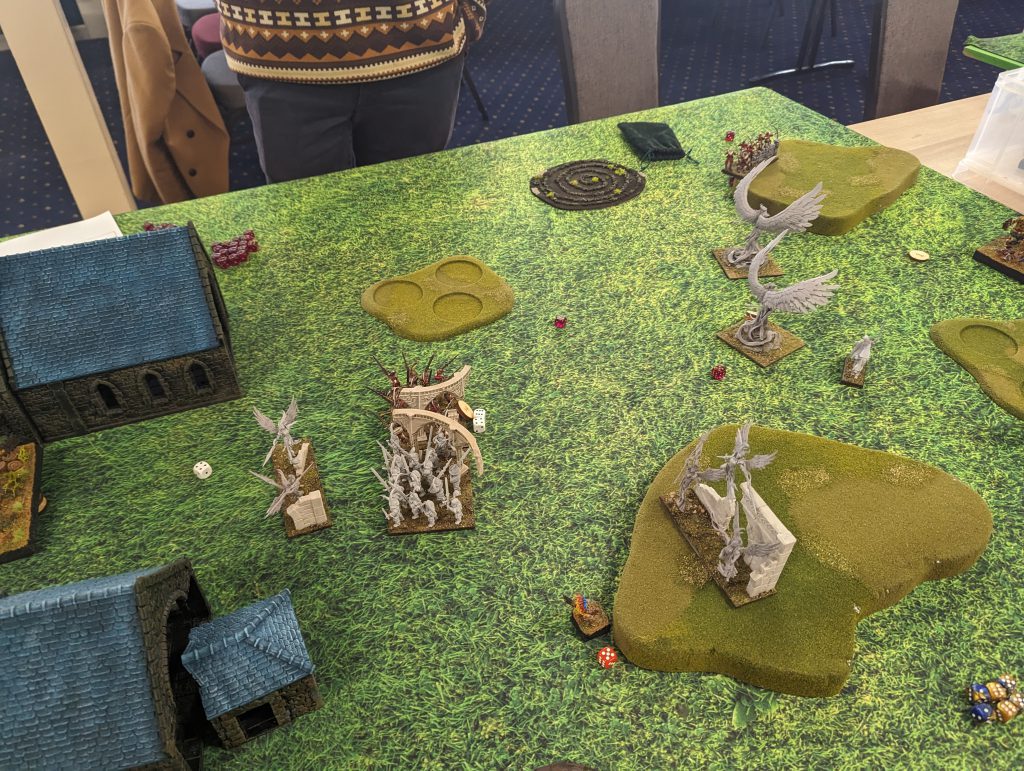
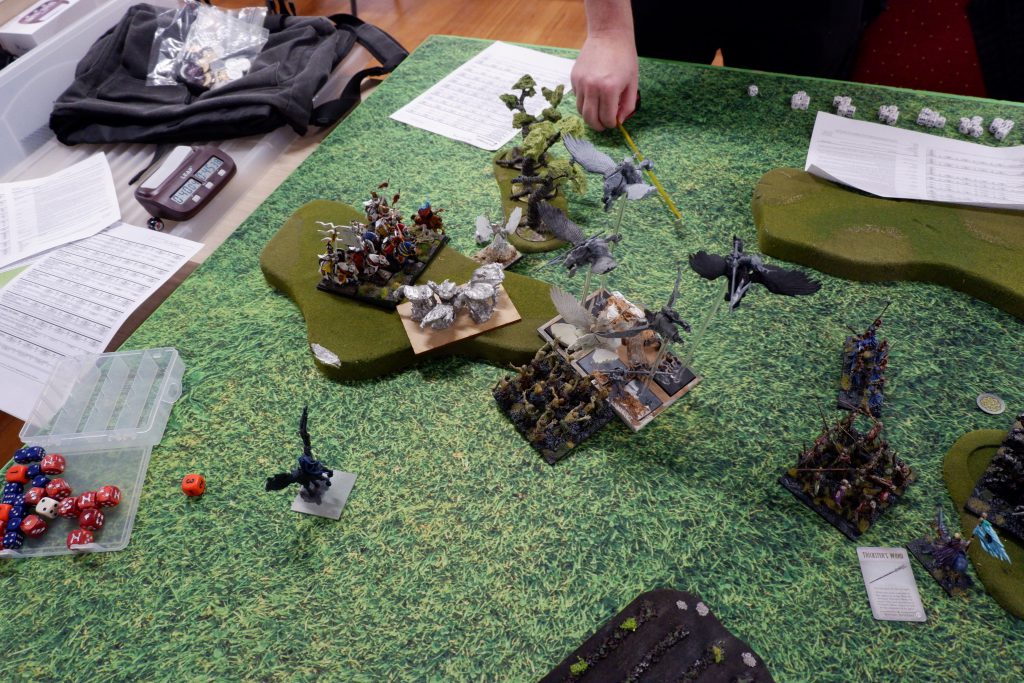
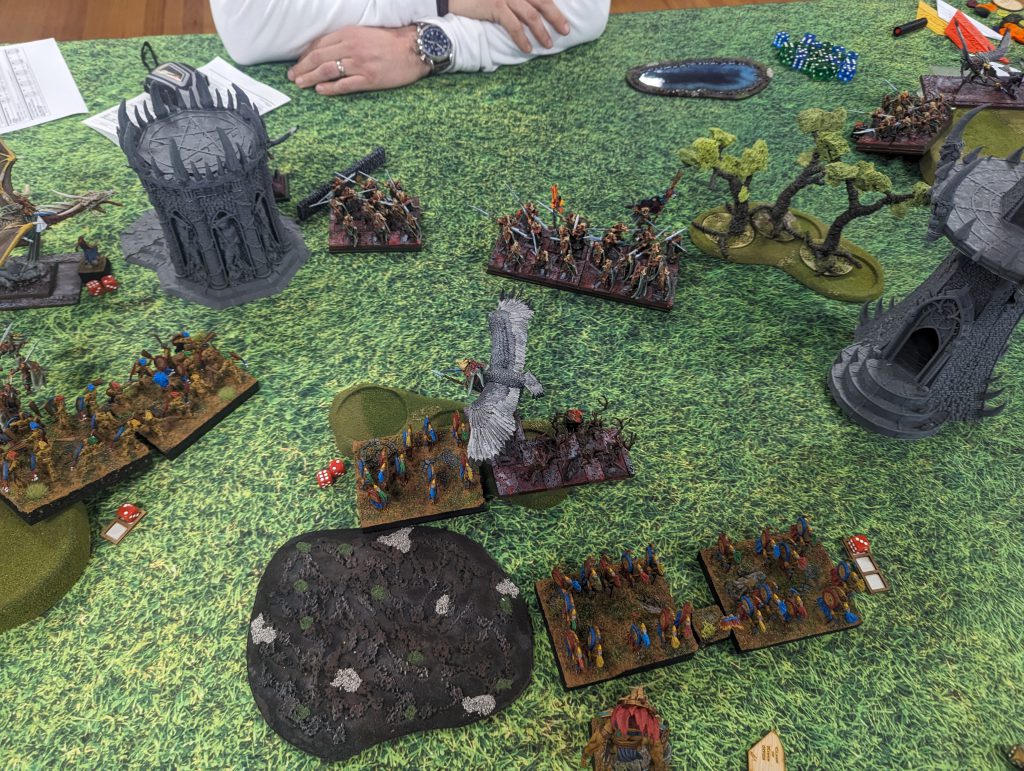
I deploy the “Strength Fallen”, a Snow Fox troop, and the Lord on Chimera facing down Jullius, the Defence 4+ Elohi horde, a unit of Knights and a Gur Panther on my left flank. I’ve backed this up with two of the Night Raiders, who are able to just sit on two tokens as well. In the middle, I have the horde of Clansmen, the Snow Troll Prime and the Magus, with Magnilde and the other Fallen further to the right but still central. On the far right, holding a token, is the final unit of Night Raiders, who’s facing down the majority of Alex’s army. Only the Arbalests are looking down towards the middle.
I’ve got turn one, and proceed to move almost everything up, just not flying forward with the Chimera yet, I’ve got to keep Jullius honest. The two Night raiders get into position, while the one on the right prepares to burn the token and pay with their lives. I manage to shoot off the Gur Panthers on my left, and that’s my turn. Alex starts jockeying for position, too, and removes the right Snow Foxes with the Wizard.

Turn 2 sees more movement. I’m pushing up on my left, and planning to break that flank the zoom around behind. I start putting the pain on those Elohi, hoping to take them off next turn. I offer the Snow Troll as a charge to his Knights, with the Clansmen ready to pounce if he takes it, but the main threat is the Fallen. Hiding directly behind the Snow Foes, they can’t be charged, and if Jullius jumps over, there’s the Chimera waiting. Instead Jullius Fireballs them on his turn.
On the right, the Night Raiders are engaged by the Elohi Regiment and the Ur-Elohi, but Alex rolls under so they only take 6 damage and live. In the middle, he gets a good hit or two off of the Arbalest, and puts 4 wounds on the Fallen there, and then rolls high and wavers them, which probably stops me committing too early and losing them anyway. On three, I take the big gamble on the left, and take the Fallen into the Knights. As long as I can shoot off the Elohi, they’ll be safe from reprisals. I do get the shots off, going in with the Magus’s Lightning Bolt too, just to get up to the double ones roll, and taking them off. I don’t quite get the Knights off, but with no Thunderous Charge, they don’t do much back.

In the middle, I just hide behind the forest, though Magnilde goes out and takes off an Arbalest, hiding from everything else. On the right the Night Raiders make their valiant last stand, but don’t do anything and are easily picked up by Alex, and they Elohi turn to start coming in. Jullius has to hop over the Knights to burn a token so the Fallen won’t take it. Alex unfortunately makes a mistake here, and pushes up his Knights on the right too far, and gives my Fallen a flank.
On Turn 4, I take that flank, and both Fallen finish off their Knightly opponents. Jullius gets a front charge from Magnilde, and gets pinned in place, with the Fallen looking at that juicy rear. Jullius moving also frees up my Chimera, so it moves to threaten the middle. The Elohi team from the right flank finally reach a position to impact the game, forcing a big reform of my midfield. Even the Night Raiders turn to throw shots down the board.
Turn 5 sees the Fallen and Magnilde take out Jullius, the Chimera kills the final Arbalest, grabbing that token, while the other Fallen plop themselves in the forest and prepare to take a big punch. It’s not quite as big a punch, as only the Ur-Elohi and the regiment go into them, while Alex plays correctly, throwing the horde after the Unit Strength of the Clansmen, landing a big waver on them.
There’s not much left of the game now. The Chimera goes off to kill the Wizard, while the Jullius-killing Fallen grabs the token the Chimera has just abandoned. All that’s left is to remove the Elohi in the middle. The Elohi regiment goes down, but Magnilde can’t get the Ur-Elohi by herself. For Alex, he needs to clear the Clansmen and the Fallen, and he’ll claim the middle token, with any overrun rolled. He does get the rolls required, swinging the game from a 4-0 to a 3-1.
A great game with a great opponent. A bit of luck helped me here, the Night Raiders on the right keeping the Elohi team out of the game for so long was very helpful, but like I said towards the start, the scenario advantage was mine going in.
Cytoplasm’s Undead vs Tucky’s Order of the Green Lady
This was a grudge match, where I demanded Tucky fight me Round 1 lest he reveal himself a coward. Somehow he had avoided me at all previous tournaments (probably because I was on the lower tables…), but no longer!
2 x Naiad Heartpiercers (Regiment)
1 x Brotherhood Centaurs (Regiment)
1 x Centaur Bray Hunters (Troop)
1 x Order of the Brotherhood (Horde) with Banner of the Green Lady, Brew of Strength
1 x Order of Redemption (Regiment) with Blessing of the Gods
1 x Order of the Forsaken (Horde) with Vial of Sacred Water, Wine of Elvenkind
1 x Avatar of the Green Lady
1 x Exemplar Redeemer on Winged Unicorn with Blood of the Old King
2 x Unicorns with Lightning Bolt (5)
Deployment
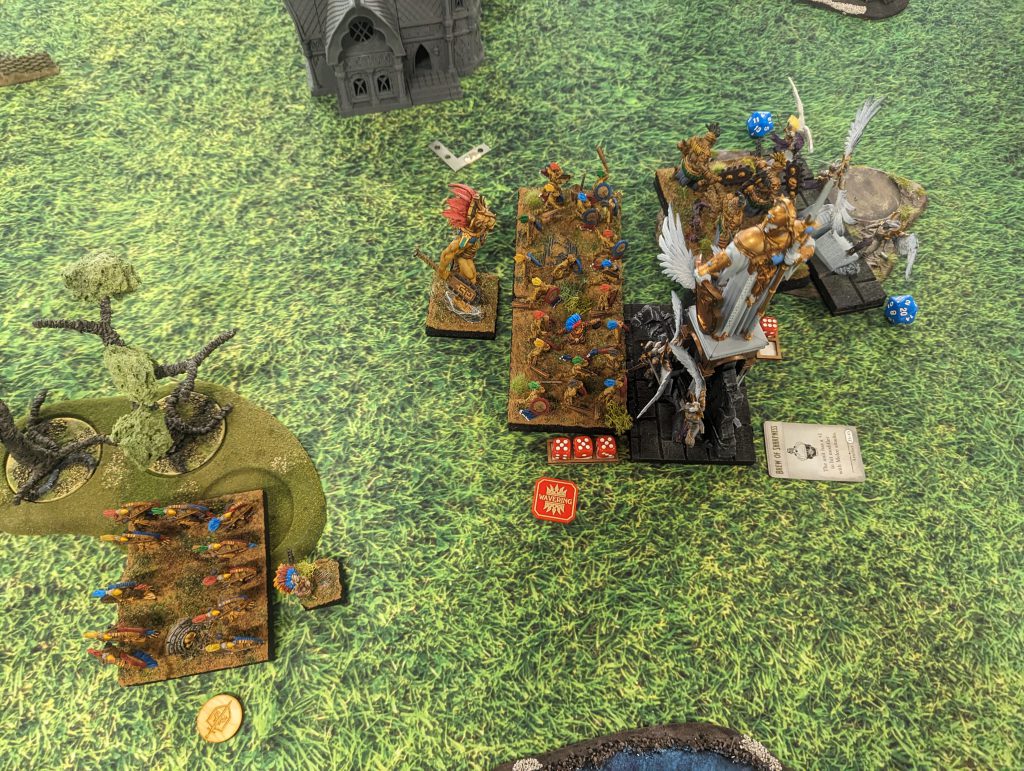
With the seven available in Salt the Earth, I put all my objectives in back corners behind impassable terrain. This is where Zombies go, ideally for the whole game. I was lucky enough to move a hill into the deployment zone, but this actually made me pick the side with less backfield tokens. Very silly.
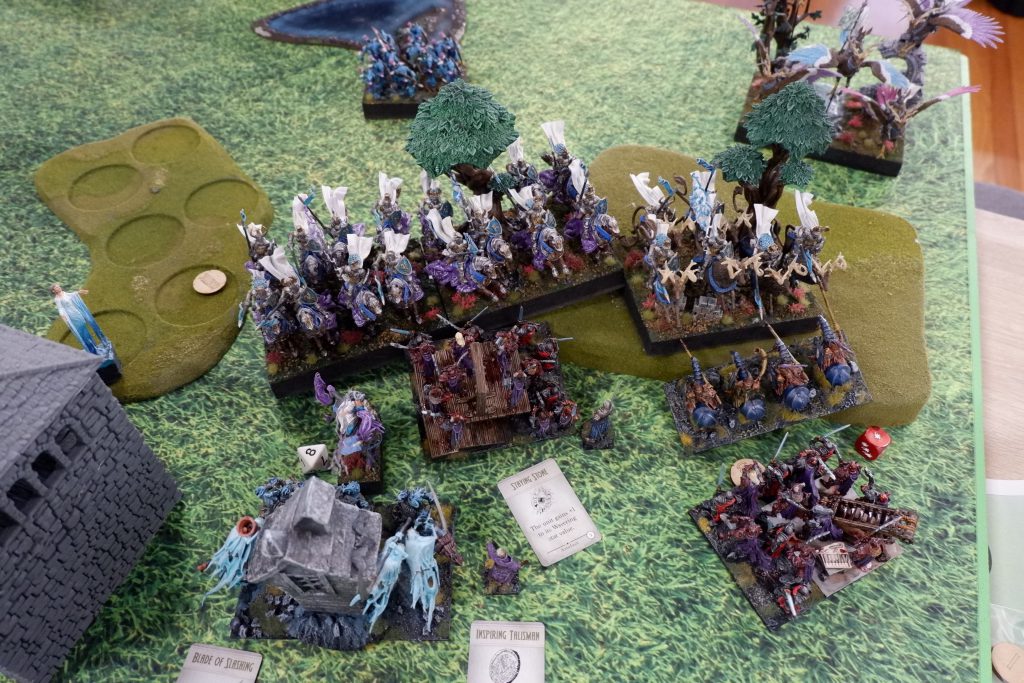
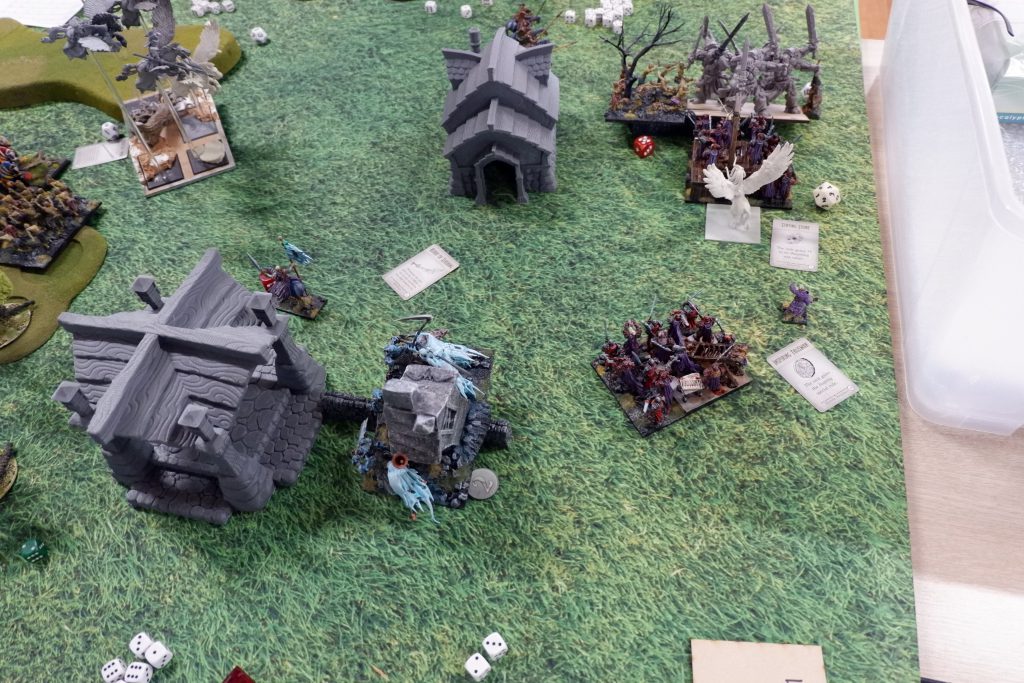
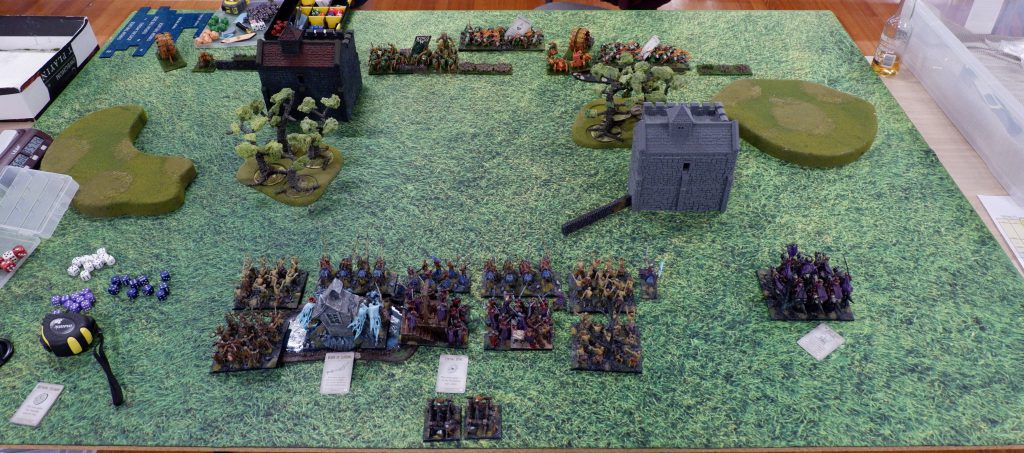
I deployed the bulk of my army on the right flank, hoping to limit his charges and avoid that cavalry horde. My slightly fast Soul Reaver Cavalry went in the middle, and the Balefires on the left hill. Tucky put down his horde of Brotherhood knights in the middle, one Heartpiercer regiment on the leftmost objective, and then the majority of the army to the right, facing off against my Wights and Soul Reaver Infantry.
The Standoff and the Skirmish
On the right side of the battlefield, the Wights and Soul Reaver Infantry, screened by Revenant Cavalry, moved up very carefully over the first three turns. With the building to the left, they were entirely protected. The Revenant Cavalry were within the threat range of Tucky’s units early on, but he did not take the bait.

In the centre, the Zombies and Skeleton Spearmen were a temptation for the horde of cavalry, but I made a crucial mistake; I did not measure the threat range of the Unicorn accompanying the horde of Brotherhood knights. Why? I misjudged the combat prowess of the unit, dismissing it as caster only. It charged into my Soul Reaver Cavalry to tie them up while the horde of knights and regiment of centaurs got through the Zombies and Skeletons.

Obviously the Unicorn only Disordered the Soul Reavers, and the horde of Knights was only 2 inches away! I need only slay the Unicorn and Overrun into the horde of Knights! But this was not to be. Dealing a pitiful amount of damage to the Unicorn, my Soul Reaver Cavalry were stuck and promptly obliterated by the Order of the Brotherhood.
The rest of the battle continued with the standoff on the right, now with a horde of knights slowly making its way over. In the end Heartpiercers moved to an objective each, while the central objective was held by the Exemplar Redeemer who just flew around the whole game. I held one objective still with my Zombies in the back, but alas, that was all I had.
The horde of the Order of the Brotherhood eventually reached the right side. My chaff (Revenant Cavalry) took a while to clear, but eventually his heavier units started getting through my Soul Reaver Infantry, and the Wights just manage to survive.
Lesson: Stick to the Plan
Somewhere between putting down the objectives and deploying my units, the whole idea of holding objectives was abandoned. Salt the Earth almost guarantees two objectives from the start thanks to my cheap Zombies, but I got distracted by what my Balefire Catapults might achieve. Considering under normal circumstances war engines are liable to miss, this was a terrible idea and I should remember for next time!
Thankfully, losing a game against one such as Stephen Tuck was not an unpleasant experience, and his army of amazing 3D printed Arthurian knights a sight to behold. I just wish I could have made more of a dent in his horde of Knights than I did.
Round 2 – Plunder
Urr’s Varangur vs Viv’s Basileans
1 x Men-at-Arms Spearmen Horde – Hammer of Measured Force
2 x Sisterhood Scouts Troop – Scrying Gem
2 x Elohi Regiment
1 x Elohi Horde – Celestial Fury
2 x Ogre Palace Guard
2 x Phoenix
1 x War Wizard – Horse, Diadem of Dragonkind
1 x Gnaeus Sallustis
Alright, another Basileans list straight away. This one is much more focused on shooting though, and I underestimated just how powerful that it’ll be. Viv’s also got a lot of tough nerve bricks that I will struggle to one shot, so this one’s going to be tricky.
Viv picks his two point token to be out in the middle, away from all the terrain, I drop mine on my far left side, again planning to break that flank and turn in. This scenario is also going to be a struggle against Viv’s list, Phoenixes play this one real well.
We get started deploying, and Viv rolls hot on his Scrying Gem, so I have to deploy 4 units to his one. There goes any hope of counter deploying. I drop all the Night Raiders on the hill in the middle of my deployment zone. The Clansmen, the Snow Troll Prime and one of the Snow Foxes go on my right flank, while I go heavy on my left, with both Fallen, Magnilde, the Chimera and a Snow Fox. I’m planning to get the two point token on the left, the one point next to it, and to grab whatever else is available during the game.
Facing me, from my right to left, Viv’s got his Sisterhood Scouts, an Elohi Regiment, a Phoenix, the Horde of Men-at-Arms, Gnaeus, the other Phoenix, the Wizard, and then the two Palace Guard Hordes. These have their flank up against a building. Then, versus my heavy flank, it’s the regiment of Elohi and the final Horde. The middle and right will be tough, but I’m confident I can get through the left flank quickly enough.

I get the first turn, and move up.
On the right, I get the Snow Foxes, Clansmen and Snow Troll Prime up to jump on anything trying to grab the tokens there. Night Raiders move up to shoot. And on the left I make a big mistake. The Foxes move up to grab the token, and I pivot them in preparation to run away. Good in theory, but now I have nothing to cover the Fallen from the Elohi. Magnilde does hop behind them safely, so I will be able to tie one unit down, but it slows me down a whole turn at least. I put a few wounds on the Men-at-Arms with shooting, hoping at least one Phoenix will stay back to heal them.

That does not happen. Viv does a bit of movement, mostly just setting up. Then unleashes his shooting, and takes off the whole Clansmen Horde in one go! Remember when I said I’d underestimate that shooting? It was here I realised how good it was. He also charges the right side Snow Foxes and wavers them (hiding in the forest), which will be their story for this game.
I know I’ve got to act fast or the shooting will destroy me, so Magnilde goes into the Elohi Horde, grounding them. Both Fallen move up as fast as they can. The Snow Foxes with the token leg it backwards. The Chimera zooms over to try to hold the middle. The Night Raiders try not to move to keep their shooting accurate, and keep targeting the Men-at-Arms. But the momentum is all in Viv’s army here. The Palace Guard move up, Gnaeus wavers the Snow Troll Prime, the Scouts waver the Foxes again. The rest of the shooting takes out a Night Raider regiment.

Turn 3 sees a few things go my way. In moving forward with the Palace Guard, he’s opened them up to attack. The extra crushing Fallen goes into the front of one, along with a flank from the Night Raiders. They kill their target. The other Night Raider gets a flank off the hill into the other Palace Guard unit, wavering it. The Chimera kills Gnaeus. It’s not as nice on the left. For some reason, I don’t commit to killing the Horde, just putting Magnidle back in, while the Fallen go to fight the Regiment, and both fail to secure their kills.
Of course, Viv hits back hard. One Night Raider dies to the Men-at-Arms, the Chimera is grounded by a Phoenix in the flank. Magnilde gets killed by Elohi, and the Troll and perpetually wavered Snow Foxes get shot off. The Magus is also disordered by the Elohi from the right.
My turn sees the Fallen finally kill the Elohi Horde on the left flank, and the other unit gets the final Palace Guard as well. The Chimera zooms off to (finally) take out a Sisterhood Scout unit. The Magus is a hero and disordered the Elohi he’s fighting.
Then Viv just cleans me up. All the shooting kills the Chimera. The Men-at-Arms get a good nerve roll and kill the Fallen. The Night Raiders get flanked by the Elohi from the left. Magus gets wavered, and I am left with just one Fallen, and one Snow Fox. All I do is grab the points I can, and Viv gets his. I end up with three points, while Viv gets 4, and the attrition over me.
Another good game, that I think if we re-racked I’d have a better shot, but there you go. A bit of luck either way could have changed the game, so you know it was a close one, and Viv was great to play.
Cytoplasm’s Undead vs Grant’s Order of the Green Lady
1 x Water Elementals (horde) with Healing Brew
2 x Earth Elementals (horde)
1 x Order of Redemption (regiment) with Brew of Sharpness
1 x Order of the Forsaken (horde) with Vial of Sacred Water, Wine of Elvenkind
3 x Pegasus
1 x Greater Earth Elemental
1 x Devoted Hero on Forest Steed, Radiance of Life (Sacred Water only), Shroud of the Saint, Heal (5), Surge (7)
1 x Druid with Tome of Darkness, Surge (7), Heal (2)
1 x Unicorn with Lightning Bolt (5)
Just like Urr, I went from one Order of the Green Lady army to the other. Compared to Tucky’s list, Grant’s went into all of the elementals available. Rocking (hah) a hefty amount of Defense 6+ units and the surprisingly durable Water Elementals, this list was going to be much tougher, but also much slower. For all the slowness, the threat range was still at maximum thanks to the Forsaken and the Pegasi, so I will need to keep my wits about me.
Skewing the tokens in deployment
The scenario of Plunder offers little agency in the placement of individual tokens; 5 across the centerline. Picking which tokens are worth 2 victory points, however, is a point of control. Seeing the battlefield and Grant’s forces, the battlefield was split into two unequal portions defined by the two blocking terrain pieces. Knowing my army would more esaily navigate the blocking terrain (smaller footprints) I picked one token on the far right to be two victory points. Grant then picked the middle-right token, essentially skewing the scoring to the one side of the battlefield.
I deployed my Soul Reaver Infantry with Zombies and Revenant Cavalry on the far right to secure that valuable token. In the middle the Wights and Soul Reaver Cavalry went for the middle right token. Those were all I needed to win. To make the acquisition of the other tokens more tentative, I put the Balefire Catapults on the far left with only one Zombie unit to screen them. I didn’t mind if they perished, in fact it would all help delay the faster component’s of Grant’s army.
Grant deployed a lot more spread out. All the Earth Elementals on the right to go against my Soul Reavers. Order of the Forsaken in the middle to meet a variety of threats, Water Elementals and Order of Redemption on the left to sweep up tokens.
The Great Heist
Immediately my Revenant Cavalry pushed up, and by Turn 2 the middle right token was mine, with the Revenant Cavalry very slowly trotting off towards Grant’s side of the table. On the far right the Greater Earth Elemental and a horde of Earth Elementals went in first as there wasn’t enough room for the second horde as well (it straggled behind). By Turn 2 the Revenant Cavalry were into the Greater Earth Elemental, and the Soul Reaver Infantry made a start on the horde. It wasn’t until Turn 3 that rocks got smashed when the Wights came in.
Originally the Wights were in the middle with the Soul Reaver Cavalry, but I realized the Soul Reaver Infantry would need some help to get through all that Defense 6+. Making the decision that the left half of the battlefield was not worth focusing on, my Wights went right and Turn 3 got a sneaky flank charge on the Greater Earth Elemental. By the end of the turn, both the Greater and horde of Earth Elementals were rubble, leaving only the second horde and the Druid to oppose me. The Wights picked up the second two victory point token.
On the left, the Order of the Forsaken flew out of range of the Soul Reaver Cavalry. Zombies first tied them up, then Skeleton Spearmen. Wraiths managed to get surged into the flank, but this unfortunately did not kill the Forsaken cavalry. The Wraiths were removed by the Order of Redemption knights, and slowly the two “Order” units made their way towards the Soul Reaver Cavalry. Meanwhile, the Water Elementals were resigned to their fate as token grabbers, and slowly went along picking up one-point tokens. The whole game, my Hex (2) was causing problems for the Devoted Hero, so it rarely got to cast spells.
Evading Doom
By Turn 5, the Pegasi and Order of the Forsaken were threatening the right side. My Wights hid behind some blocking terrain, and my Revenant Cavalry had to get creative by only offering flanks in blocking terrain to the Forsaken knights. The Order of the Forsaken, kept attempting to get a good angle, but thanks to the blocking terrain my Revenant Cavalry could keep safe. Not my proudest moment in terms of honourable warfare, but it was a two-point token we were deciding. The remainder of the game was slowing down the Order of Redemption, and not dying to pesky Pegasus charges.
In the end, I kept the pair of two-point tokens, just as planned. What wasn’t planned was how quickly those knights would get through the units I threw at them. To be fair, Zombies and Skeletons are not much to buffed up knights, but it was still a surprise.
Grant was a great opponent and the units he had painted promised that the whole army would be quite the treat to see once finished. I think he has now learned just how annoying flanks and blocking terrain can be.
Round 3 – Kill
Urr’s Varangur vs Ken’s Elves
2 x Therennian Sea Guard Regiment
1 x Therennian Sea Guard Horde – Fire-Oil
1 x Kindred Warriors Regiment
1 x Hunters of the Wild Troop
1 x Stormwind Cavalry Regiment – Quicksilver Lancers, Blade of Slashing
1 x Elven Archmage – Boots of Levitation, Alchemist Curse
1 x Army Standard Bearer – Lute of Insatiable Darkness
1 x Argus Rodinar
1 x Dragon Kindred Lord
**The Swirling Tempests Formation**
2 x Drakon Riders Regiment
1 x Lord on Drakon – Mace of Crushing
Ok, 1-1 for the day so far, so (hopefully) should get an easier opponent. Nope, as a testament to how strong the field is at ConVic, I’ve got current Australian Master Ken, and his Elves, and we’re playing Kill, a scenario I have very little practice at.
I deploy differently for this one. Night Raiders are still in the middle, with the Magus and Snow Troll, facing off against all the Sea Guard and Hunters of the Wild, with the Standard Bearer there to Inspire. Clansmen go to the left, with Magnilde, a Snow Fox regiment and the “Sharpness Fallen”, lined up against Ken’s Stormwind Cavalry, the Dragon Lord, the Kindred Warriors and the Alchemist Curse Mage. Argus is also hiding behind the tower there. My right is the Swirling Tempests Formation versus the “Crushing Fallen”, Snow Foxes and Chimera.
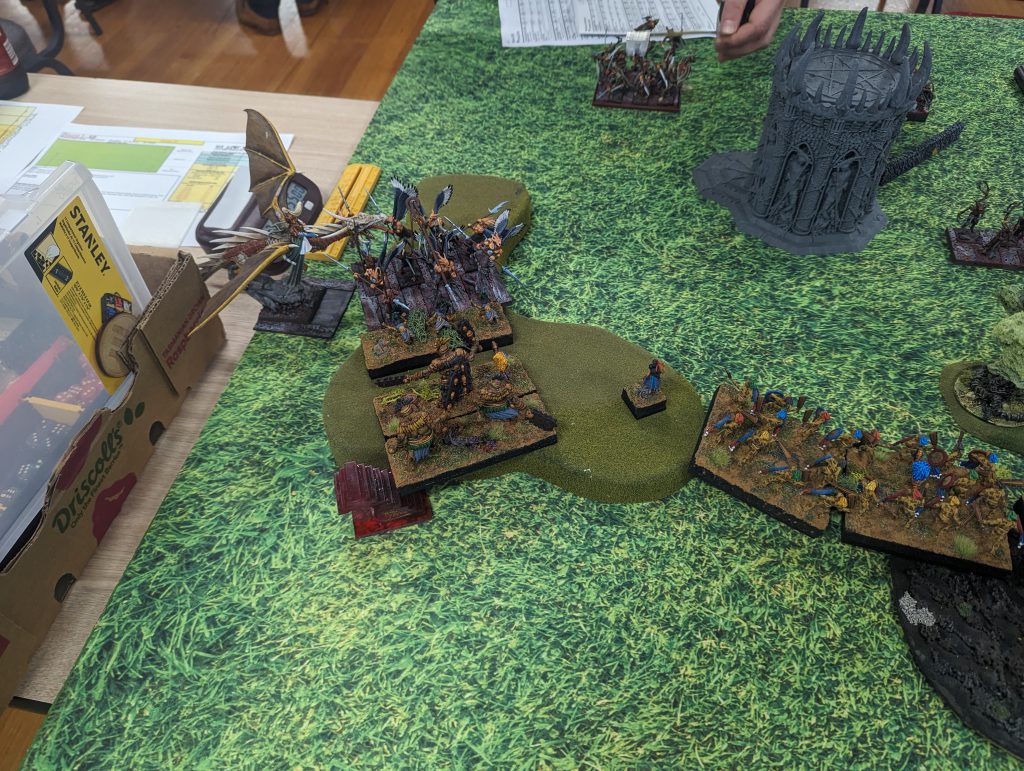
I get first turn again. I just move up, and throw a few shots down field. Ken just goes for it, obliterating the Snow Foxes on my left with the Stormwind and zooming the dragon up behind. The Lord on Drakon also abandons his buddies, swinging in towards the middle. Magnilde takes a few wounds from the Alchemist Curse Mage, and a few damage is spread here and there from the Sea Guard shooting.


I counter attack those mean old Stormwind Cavalry, and the Fallen get a waver on them. I did mean to Bane Chant them, and would have taken them off if I did, but I forgot to move the Mage into the right spot. A few ciders were starting to have an effect. The waver ended up probably being the best outcome anyway, their inability to move locks the Dragon out from any juicy targets. Magnilde disorders the Mage in revenge, while some Night Raiders prepare to flank the Hunter of the Wild. I zoom up on the right. Snow Foxes charging the Drakons and locking them down for the Fallen, while the Chimera simply stops just out of engagement to block the other units line of sight (it couldn’t make the charge).
The Snow Foxes are subsequently killed. The Fallen are flanked by the Kindred Warriors, but they fail to do any damage. The Dragon Lord fights Magnilde, who lives, and the Drakon Lord also fails to kill the Night Raiders in the woods.

I keep on swinging, too. Clansmen kill the Kindred Warriors, Night Raiders and Troll Prime kill the Hunters of the Wild. Magnilde puts a few wounds on the Dragon Lord, and the Fallen on the right kill the Drakon Regiment. The Fallen on the left also mess up the Stormwind, but roll snake eyes. I think this is where I should have used my “Burden Bowl Blessing” Token for the nerve reroll, but it seemed like it wouldn’t get punished.
Ken hits back with those Stormwind Cavalry. They move around the Fallen and hit the flank of the Clansmen, doing one or two damage, so not punished. Magnilde tanks another Alchemist Curse, but the Dragon Lord wavers the Troll, and the Sea Guard start fighting the Night Raiders, and one unit puts a few wounds on the Fallen on the right.

Hitting back. Magnilde kills the AC Mage, Stormwind die to a Lightning Bolt. Clansmen and Fallen both flub it into the Sea Guard. The Clansmen are killed by a flank from the Dragon. Magnilde takes a hit from the Drakon Lord, but it’s Ken’s turn for a snake eyes. The Night Raiders are all cleaned up by the Sea Guard, and I’ve pretty much just got a turn to move. The Fallen on the right clears their Sea Guard, but the one on the left just has to move. Magnilde ducks around the building to stay safe, and threatens Argus.
Then we get Turn 7, and I go for some big (read: Stupid) plays, and basically throw the game. Too little time on the clock, not enough scenario practice and moving onto the spirits means I throw away both Fallen and Magnilde on Turn 7, pulling a probable draw to a loss. I do get the Dragon Lord, but I was trying to kill the Standard Bearer and overrun to get the Sea Guard, but should have just ran it all away. Ah well, it was a loss that was my own fault for being greedy. Still a fun game and Ken was a great opponent (you’ll see that as the main theme).
Cytoplasm’s Undead vs Oz’s Ratkin
3 x Shock Troops (horde) with Plague Pots
         - Brew of Sharpness
         - Brew of Strength
         - Aegis of the Elohi
3 x Vermintide (regiment)
2 x Death Engine Impaler
1 x War Chief with Fleabag Mount, Aura (Vicious – Infantry only)
1 x Brute Enforcer with Inspiring Talisman
1 x Night Terror with Pipes of Terror
*Smoke, Mirrors and Death*
2 x Shredder
1 x Death Engine Spewer
Like Order of the Green Lady, Ratkin are an army I have little experience fighting. I know they are similar to Goblins, but can hit a bit harder, and be quite a bit more durable with Rally and wound recovery. Oz’s Ratkin leans into the tougher Shock Troops, supported by the Death Engine Impalers and shooting from the formation, Smoke, Mirrors and Death. The scenario is Kill, so it’s time to find out just how killy my Undead can be.
Narrowing the Slaughter
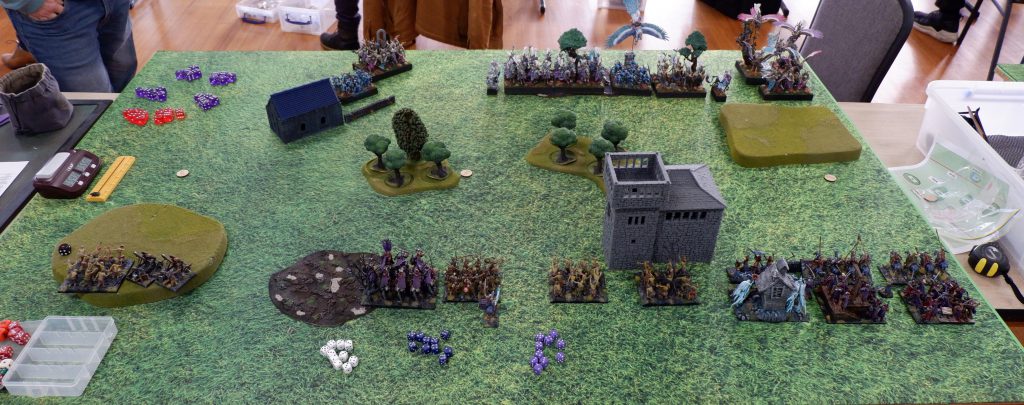
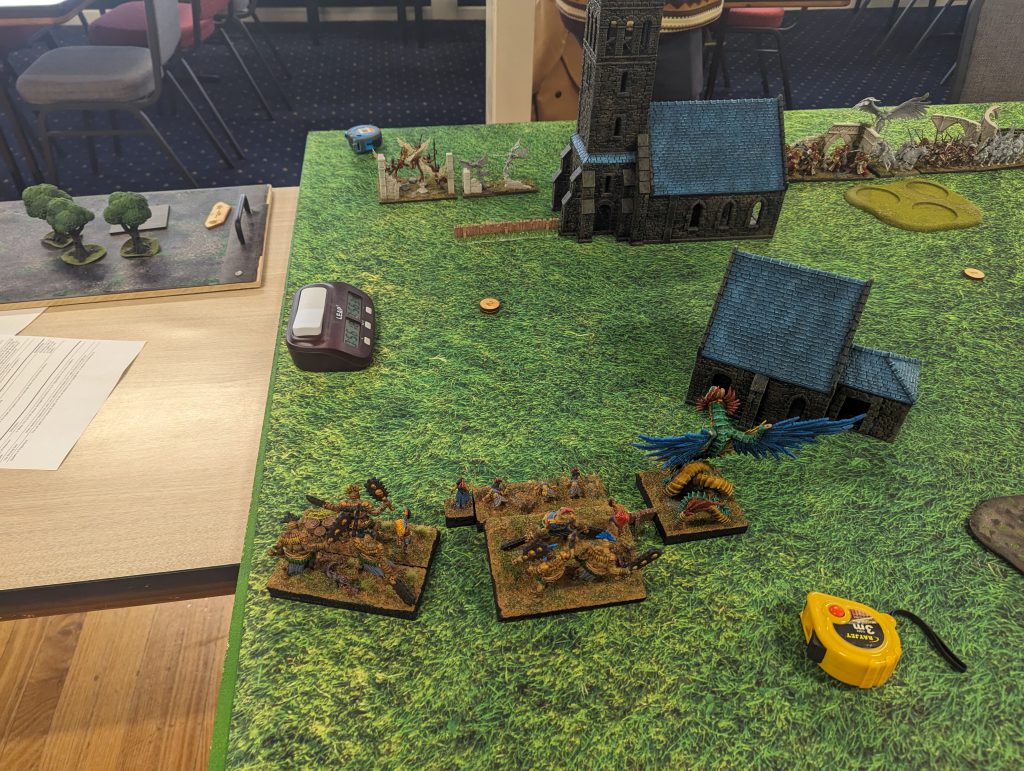
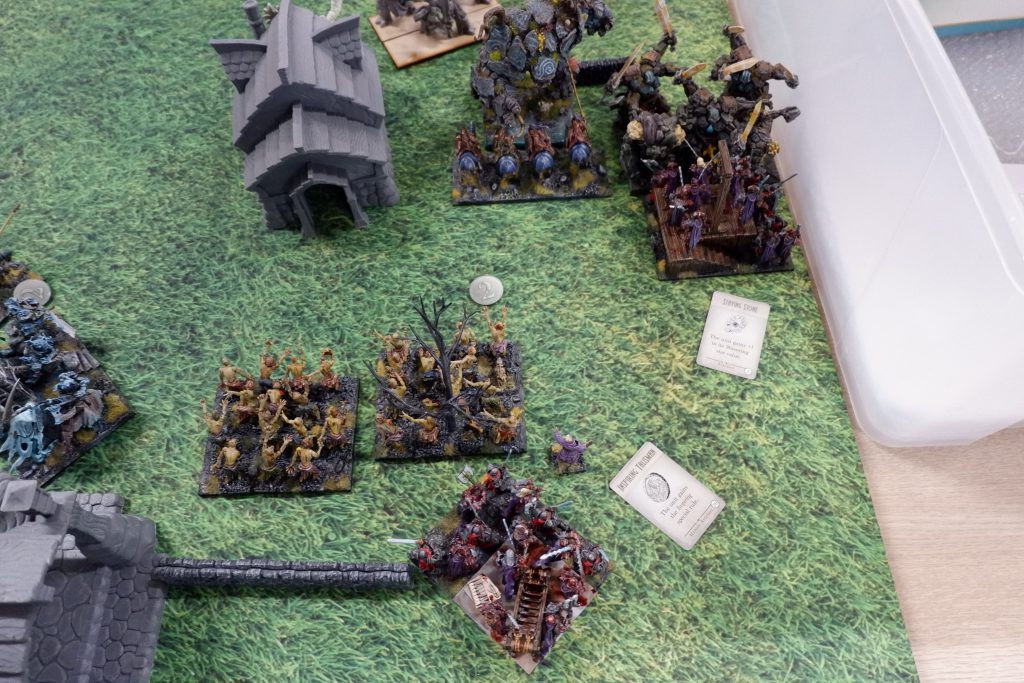
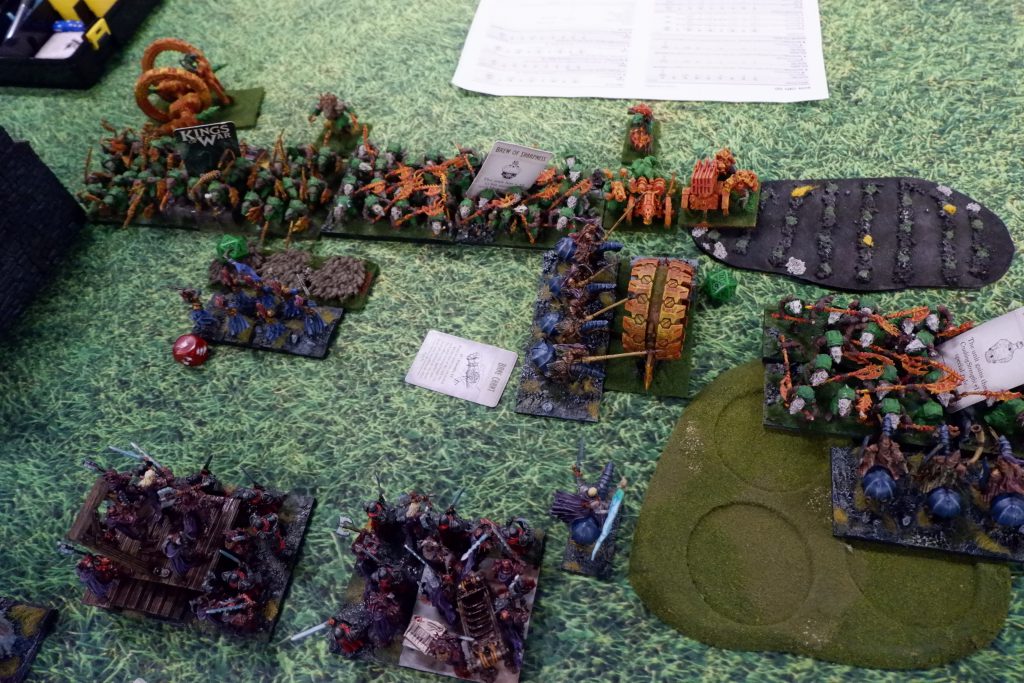
The battlefield was dominated by the forest and blocking terrain. With one blocking terrain and one forest spanning the width of the battlefield at each one third, it forced the battle to be right in the centre, while also ensuring flanks were moderately protected. I took this to indicate my best approach is a full-frontal assault. I castled up my forces like never before; a full layer of Revenant Cavalry, Wraiths and Zombies, then Soul Reaver Infantry and Wights flanked by Zombies and Skeletons and Balefires at the back. The Soul Reaver Cavalry were given the right flank, to make their way past the blocking terrain and see what havoc they could cause.
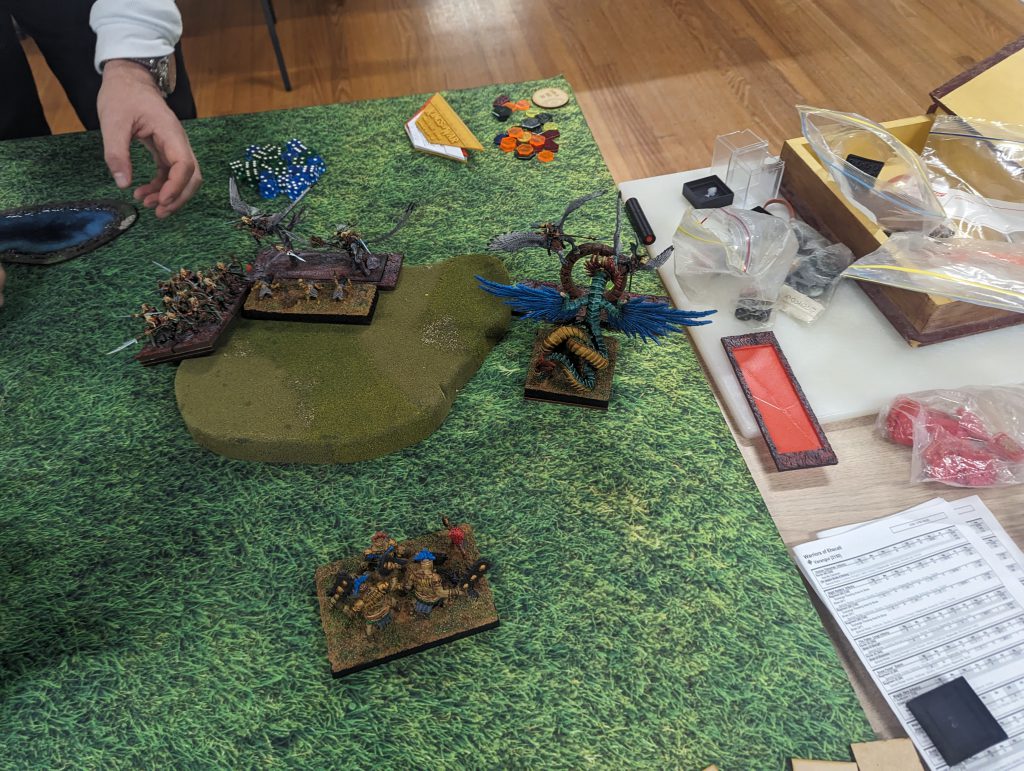
Oz’s deployment had a big problem right from the start; there wasn’t room in the gap between blocking terrain for his three hordes of Shock Troops. While two got to sit in the gap all buffed up, the third had to sit on the right with a forest in front. This would hinder his ability to get it into desired combats. It was also limiting the firing lanes for his war engines. They did not want infantry in the way, but this looked like an unavoidable situation. Flanking on the left, Oz had put the Night Terror and a Death Engine Impaler, while everything else was with the main force.
Non-stop Carnage
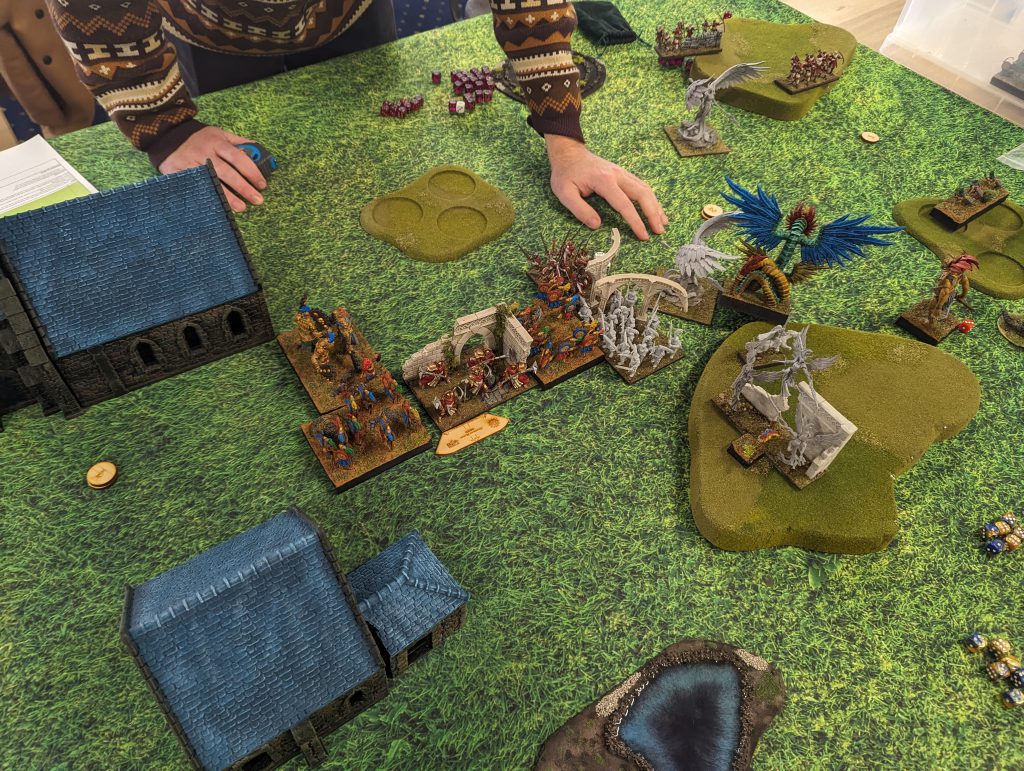
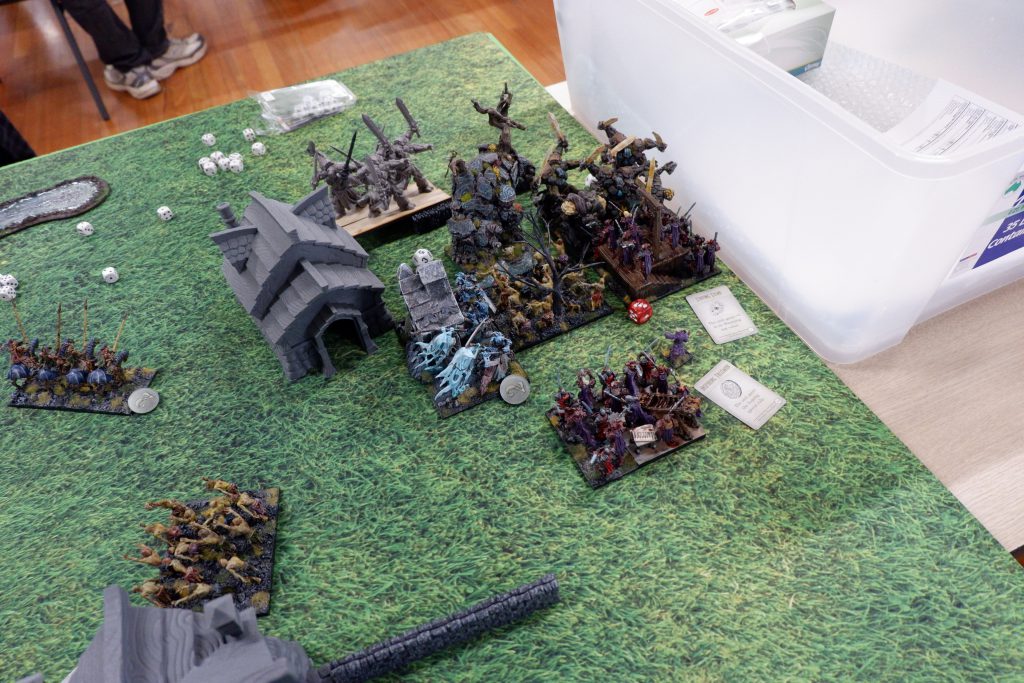
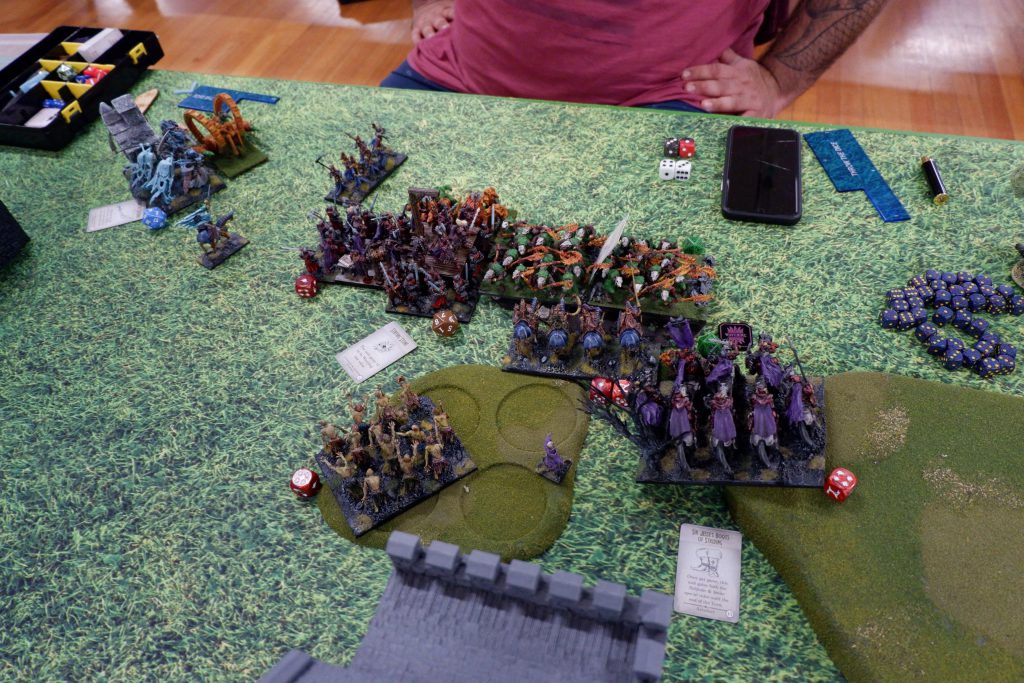
Except for the first turn, the battle was brutal. Vermintide swarms went forward to delay both my main army, and my Soul Reaver Cavalry on the right. To make sure my hammers could get into position, all of my chaff charged off in Turn 2. Revenant Cavalry pinned down the right-most Shock Troops stuck in the forest, while the Wraiths went into the Vermintide, which blocked up the entire line of Shock Troops in the middle. The other Revenant Cavalry went into the flank of an Impaler.
My chaff didn’t kill anything. But now the Ratkin were getting really stuck. To free up some space, the middle Shock Troop horde rear charged the Revenant Cavalry that had flanked the Impaler. This worked out well, but now the horde had to turn back to face Soul Reaver Infantry – both regiments.

Turn 3 saw all the hammers of the Undead strike; double Soul Reaver Infantry into one horde, Wights into another, and Soul Reaver Cavalry into the last. Unsurprisingly, only the Soul Reaver Infantry managed to win out, while the rest set in for the longer fight. The Wraiths, untouched by the Vermintide, flew off to hit the Brute Enforcer’s flank, killing it and setting up a flank on the Shock Troop horde fighting the Wights that would eventually free the Wights by Turn 4. The Soul Reavers would slowly chop through the Vermintide, Death Engine Impaler before descending on the last Shock Troop horde in Turn 5. This horde had lasted the longest thanks to the forest and backing away from the Soul Reaver Cavalry, although they did get Wavered.

Eventually all rats were dead except for the Night Terror, who, along with the other Impaler, had managed to get through Zombies and Skeletons that were all thrown to stop them threatening flanks and rears on the main force. The Night Terror decided to hit the Balefire Catapults, avenging the Impaler that was through crazy rolling destroyed by the catapults who hit it for maximum damage and rolled some hot nerve.
Rats, In Memoria
Oz has a great looking Ratkin army, but unfortunately the scenario and the terrain meant he couldn’t get out of them what he needed. I also had some crazy rolls (notably the Balefire Catapults) which only reinforced the skewed nature of the game. Were there objectives to hold or a dominate circle to control, it might have been different, but the Undead didn’t need to hold back.
This was also the first game where I tried to really layer up my army and keep it all together. It made the whole force work smoothly, with one layer of combats immediately followed by another with advantageous positions.
Given the nature of the game, Oz would have been within his rights to be annoyed, but instead he was a laid-back opponent that was just enjoying the event. He learnt a few lessons, and will be back with an even tougher list, and I look forward to meeting it with whatever army I am collecting by then.
Summary of Day 1
The entire day was great fun for all, and by the end of game three it was time to head over the road to the Waltzing Matilda Hotel for dinner and drinks.
Urr:
After game three, I’m at 1 win to two losses, which is about where I’d expected to be, though a bit disappointed I didn’t make that last game a draw (though that might not have even been possible anyway). My games have all been close, so I’m sitting at 13th out of 22, so right around the middle, and I am happy with that.
Cytoplasm:
Despite my grudge match against Stephen Tuck not working out, I managed to win my next two games and climb the rankings. This ensures tomorrow will be difficult, but I think I have managed to figure out how to work my Undead against more opponents. Let’s just hope I know what I am doing for Day Two.
—
Keep an eye out for the next article in two weeks covering our final three games at ConVic 2023. Thanks for reading and let us know what you think!
Have any questions or feedback? Drop us a note in the comments below or email us at contact@goonhammer.com.
