We’ve had enough time to get to grips with the armies of 10th Edition, so over the next few weeks we’re going to be publishing a competitive faction focus for each of them, showcasing what’s been working for them in early tournament play. Today, Wings takes a look at Chaos Daemons, one of the factions that have significantly outperformed our early expectations.
We hope you’ve got the monster mash queued up on your music streaming service of choice, because it’s time for Chaos Daemons. Big monsters, appearing out of nowhere, impaling people with spears/claws/axes – what’s not to love? Let’s dig in, but before we do I’d just like to say thanks to Warphammer’s Mike P for providing some extra tips and insight while we were putting this together!
Why Should You Play This Faction?
Daemons are all about smashing people with a rolling wall of gigantic monsters, pushing forward an insidious wave of darkness that makes the opponent’s situation ever more hopeless. They accompany this with a potent suite of mobility tools that allow aforesaid gigantic monsters to catch opponents by surprise, and also reward you for planning a few phases ahead. Play Daemons if you want to unleash some of the nastiest nightmares in the game, but in a surprisingly cerebral fashion.
Five Things You Need to Know
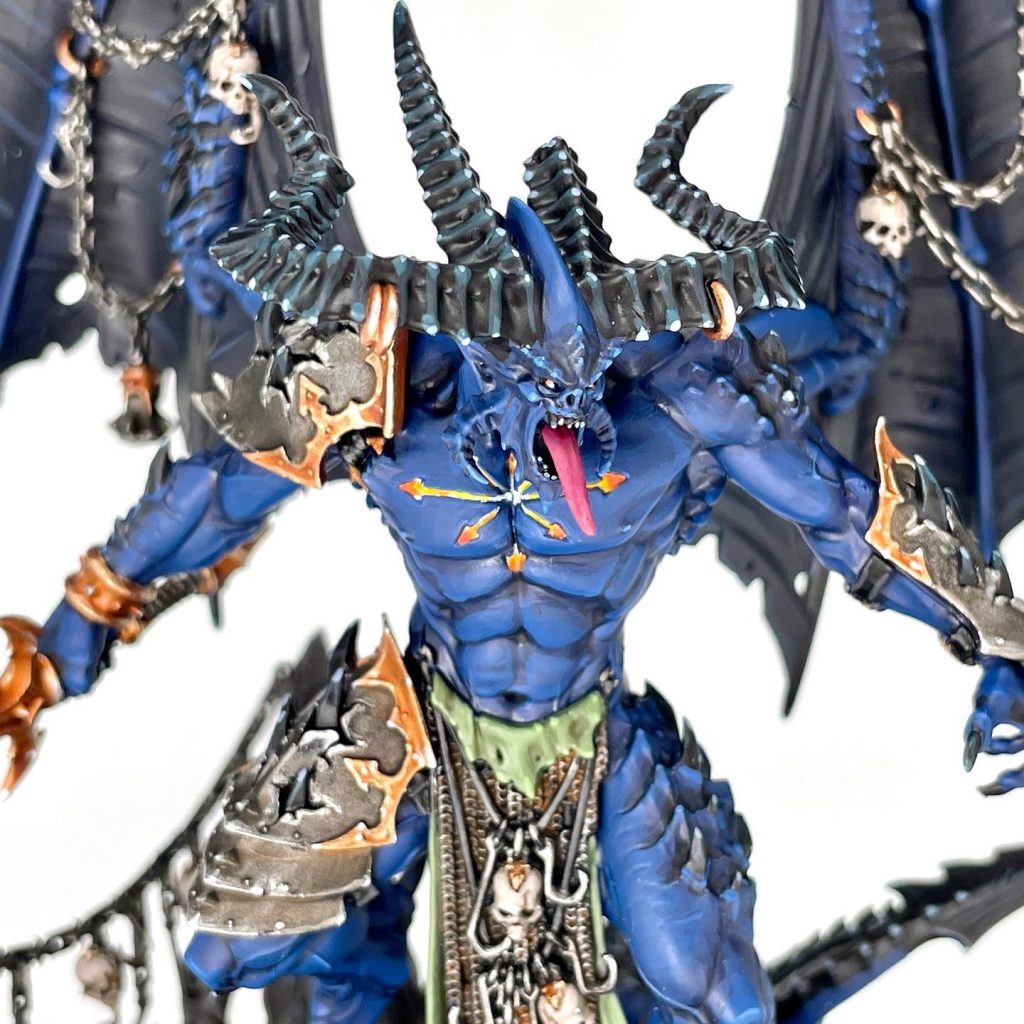
- Be’lakor Makes the Army Work: Be’lakor, and in particular the Wreathed in Shadow aura, does a huge amount of work in carrying the army. It means you can run a list full of big monsters without worrying too much about getting instantly alpha-struck off the table, and combines with Lords of Change to force the enemy to engage on your terms.
- Monster Mash Good: Alongside Be’lakor, pretty much all flavours of Greater Daemon are very potent, providing you with lethal killing power both up close and at range.
- Mediocre Battleline: Daemon Battleline units are generally a mixture of underwhelming, overcosted or both. This reduces your options on list diversity, and makes the next point a bit less impactful than it might otherwise be.
- Deep Toolbox: You have lots of different Character options to pick from, providing a huge array of effects to build around. It’s hampered by the units they can lead being mediocre, but some are good enough that you’ll still think about it
- Managing the Shadow is Important: The Shadow of Chaos flips on and off at the start of every phase, so sometimes what you do early in the turn can have a big impact on your later options, particularly with the Warp Surge Stratagem
What Are the Must-Have Units to Start This Faction?
Be’lakor and Big Bird. Buddies for life. Also the Changeling. After that, more Greater Daemons and Flamers of Tzeentch, with Nurglings to finish.
Be’lakor’s ability to protect your army in the early game is critical to being able to use lots of models with a big footprint and get away with it. Wreathed in Shadow isn’t always going to completely prevent the opponent shooting at you turn 1, but it certainly will sometimes, and even when the opponent can move into range it will often stop them from focusing fire on a single target, which since your units can take quite a bit of punishment is often enough to keep them in the game. The utility doesn’t stop rolling once battle is joined either – The Dark Master ensures that a bunch of your stratagems are active at crucial moments, and he’s a very dangerous killer to boot. Bluntly, put him in every army you build, and expect to struggle if you don’t.
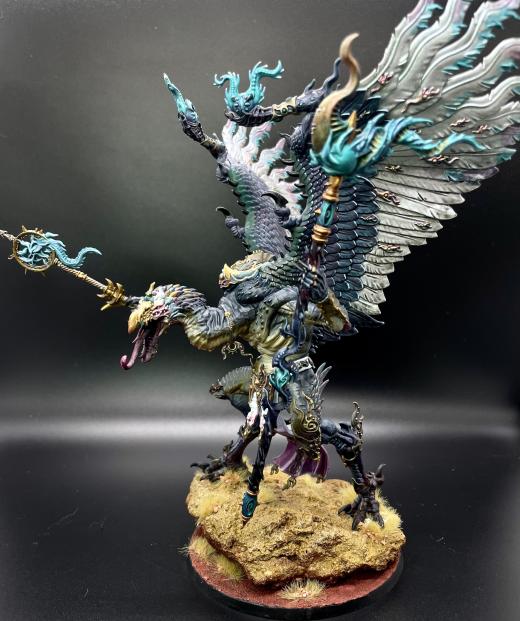
Next up, Greater Daemons, with the Lord of Change probably being the first you should obtain as they’re the most commonly seen in multiples. The classic flavour is an efficiently costed shooting threat who puts a bunch of pressure on enemies from a distance, while Kairos provides vital CP manipulation. You only need one, who should always be rocking the Everstave (because S12 is a world of difference from S10 right now), but picking up a couple won’t hurt.
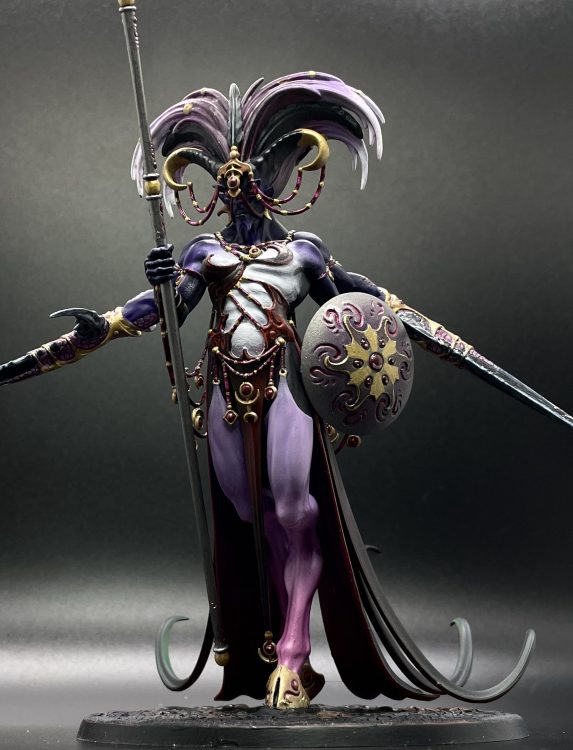
The second best Greater Daemon option is Shalaxi, who is pretty much a masterclass in how to make a 400pts model feel worth the price. Ultra-fast, ultra-deadly, hugely disruptive to opposing Leader-based plans thanks to being able to just impale them on a whim, and incredibly durable to round everything out. Not much more to say there, to be honest, beyond encouraging you to make sure you get the Shadow in place for Advance/Charge. Shalaxi is a powerful weapon whether you start them on the board, Deepstrike them into Shadow, or Rapid Ingress them.
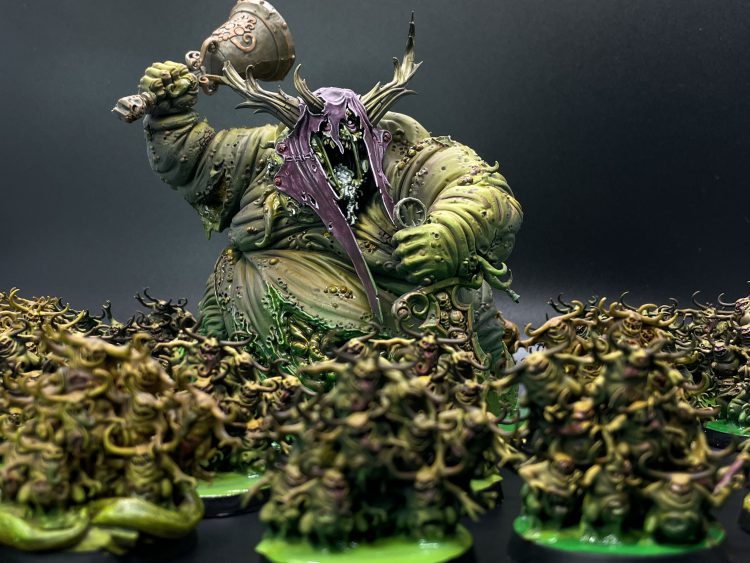
You can basically not go wrong with Competitive Daemons if you start your list with Be’lakor, Shalaxi and an Everstave Big Bird, which is a cool 980pts spoken for. That’s still space for a few more big threats though, and both Bloodthirsters and Great Unclean Ones are seeing use (as well as Tzeentch Soul Grinders if you want to go a bit smaller). The Bloodthirster with a great axe is “just” another fast, lethal threat to help keep opponents on the backfoot, while the Great Unclean One (with the Endless Gift, and usually on the default flail/bileblade loadout) gives you a monstrously tough body to squat on a midfield objective and rack up points. Because Daemons have access to the Corrupt Realspace stratagem, as long as they can keep the opponent on the back foot they can hold on to objectives with fewer units on the table than most, so going very tall with lots of Greater Daemons is a very real plan.
Usually, you’ll still want to round out with a few more dedicated positional pieces though, and the Changeling is foremost among these. The Changeling is cheap and incredibly good at holding an out-of-the-way objective – Lone Operative stops them getting shot, and an opponent within 12” of them also runs the risk of failing a Battleshock test to shoot at them, or getting no-sold by Mischief and Confusion. On top of all of that, they also have a strong Torrent weapon, meaning that something like an Exaction Squad risks getting toasted when they turn up nearby. The Changeling is so good at their job that they’re being taken as an ally in a wide variety of armies, so you should definitely take them here! The Blue Scribes can also provide a second Lone Operative, but just bear in mind that they’re vastly less good in the role.
Finally, additional glue – usually Flamers of Tzeentch, because they’re cheap, relatively quick and have a small footprint, making it easy to slot them in using Denizens of the Warp. They’re also another unit with a Torrent weapon, making them great at duelling other cheap objective units or enemy lone Operatives. Flesh Hounds are also available for your speedy, cheap needs. Last and least, Nurglings are good for screening in matchups where that matters and waiting in the warp to score a Secondary in matchups where it doesn’t. Just remember that they can’t secure Objectives any more, as they have OC 0.
Other units do see some use, and we’ll discuss a few more, but you can 100% build your army entirely with the ones listed here and be pretty happy with it.
How Does This Faction Secure Objectives?
Plan A here is to put a Greater Daemon or The Changeling on one. The former can be very hard to kill, the latter is a huge pain to take an objective off for all the reasons outlined above.
Plan B is to use trickery. The Shadow or Denizens of the Warp can let you sneak a unit directly onto an objective where the enemy might otherwise not be expecting it, While Pink Horrors are rather anemic damage dealers, having one unit in your army and planning to do this with them can be decent, as they take a long time for opponents to chew through. The other power move is to just use Corrupt Realspace to lock an objective to your control, and stop the opponent ever taking it back. Sometimes easier said than done if they have units that can deep strike, but if they don’t then feel free to lock in and move on.
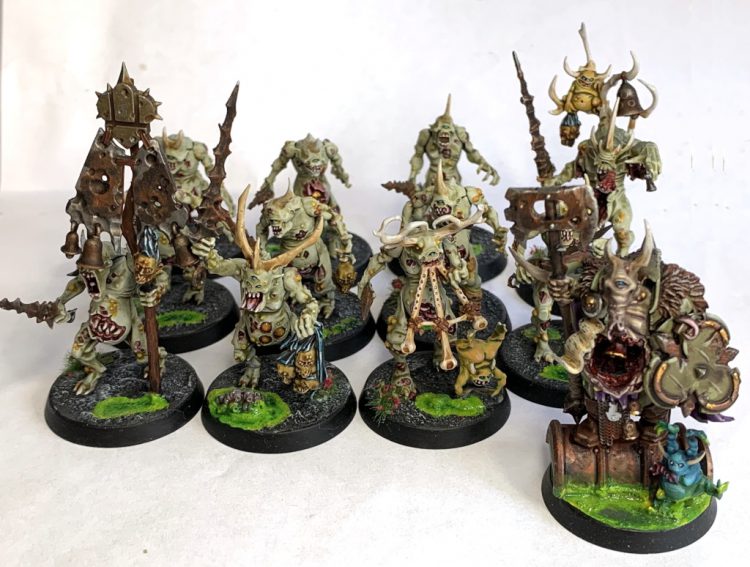
Plan C brings in the other big use for a one-of inclusion of one of the Battleline units. Plaguebearers are pretty tough, and have the built in ability to lock-in an objective with Infected Outbreak. You can also further enhance their ability to control a position with a Spoilpox Scrivener or Sloppity Bilepiper – the former pushes them to a tasty OC of 3 apiece, which is tough for many armies to beat, while the latter can inflict Battleshock tests on nearby enemies every fight phase, setting up failure cases for enemies trying to take a position. Kind of a dealer’s choice here – the Scrivener is a bit more predictable and reliable, but the Bilepiper adds some movement as well, which is valuable on a slower unit (though you can also teleport them around with The Realm of Chaos).
Because of all of their movement shenanigans, Daemons are much better situated to score Tactical Secondaries than almost any other army in the game. Don’t feel pressured to max your own Primary score in every single matchup. Because you are excellent at denying their Primary and scoring Secondaries, you are still very capable of winning even if your own Primary score isn’t maxed out.
How Does This Faction Handle Enemy Hordes?
Happily, plenty of the tools you want to include anyway are pretty effective at killing hordes. Many of your shooting attacks on bigger threats are Blast, your best “glue” unit has a powerful Torrent weapon, and a lot of the big Daemons pack a sweep attack of some sort. Your big challenge with hordes is more around managing the board – you often don’t have that many units, so if your opponent spreads out you can’t be everywhere at once (and it can also be hard to maintain the Shadow. Keep Denizens of the Warp and The Realm of Chaos in mind to get your units (particularly Flamers) around the table in a hurry to try and mitigate this, and against non-GSC hordes try and ensure that when you target a unit you wipe the whole thing – a few left over models can be disproportionately annoying for you.
How Does This Faction Handle Enemy Tanks and Monsters?
Up close, Shalaxi and Be’lakor are your bread and butter for this (plus a Bloodthirster if you have one). Shalaxi or a great axe Bloodthister have a pretty good shot at one-rounding a Knight (and will trivially stomp anything smaller), and Be’lakor isn’t far behind on that front. At range, your options are a bit more narrow, mostly coming from Tzeentch. The Everstave bird is your default option, as at S12 (and picking the Sustained HIts option) they can take a real chunk out of something, and you can back them up with Tzeentch Soul Grinders. The warp gaze shooting attack that the changer of ways provides is extremely nasty (especially once bumped to S13 by the Big Bird aura), and a Grinder will also cheerfully pinch a tank to death in melee on top of that. Don’t forget that Soul Grinders are the only Daemon unit with the Vehicle keyword, giving you access to Tank Shock to take up to 6 wounds off an important enemy unit before you make your attack.
What Combos Should You Build Around?
Plenty of the tools you want to build around have already been discussed, so to recap make sure you’re considering:
- Be’lakor with lots of big friends.
- Taking the Everstave on a Lord of Change
- Taking the Endless Gift on a Great Unclean One.
- Combining Plaguebearers with a Bilepiper or Scrivener to lock in objectives.
- Combining Warp Rifts with charge bonuses or rerolls from sources like Instruments or Shalaxi for mostly reliable deepstrike charges.
There’s a few more to think about though, some which provide you with ways to use a few more tools from the roster.
The Be’lakor Two-Step
Less a specific unit, more a technique. Because Be’lakor brings The Shadow of Chaos with him, dropping him into a position (perhaps with Realm mid-game) can open up options for how you deep strike your other units thanks to Warp Rifts. He can also help give you reach on the table – the condition for using the Warp Surge Advance/Charge stratagem is to be within the Shadow of the Warp at the start of the Charge Phase, so even if Be’lakor and, say, Shalaxi are quite far apart at the start of Movement, they can meet up, high five, then sic Shalaxi on something.
Bloodcrushers and a Skullmaster
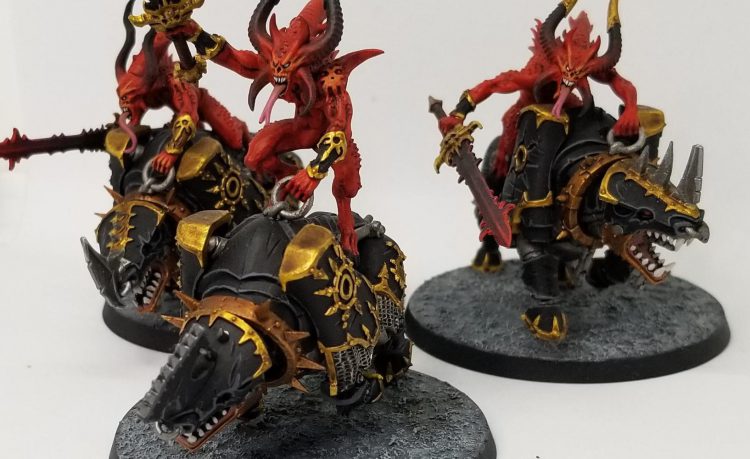
Bloodcrushers are reasonably aggressively costed, and the combination of the Mortals they deal on the charge (with the Skullmaster adding even more when they swing) means that you can flatten a broad range of targets. They are also well statted to soak a counterpunch (T7 gets you above many anti-elite guns like avenger gatling cannons, four wounds protects you from getting owned by D3 stuff, and the 4++ invuln protects you from anti-tank weaponry).
Daemonettes and Syll’Esske
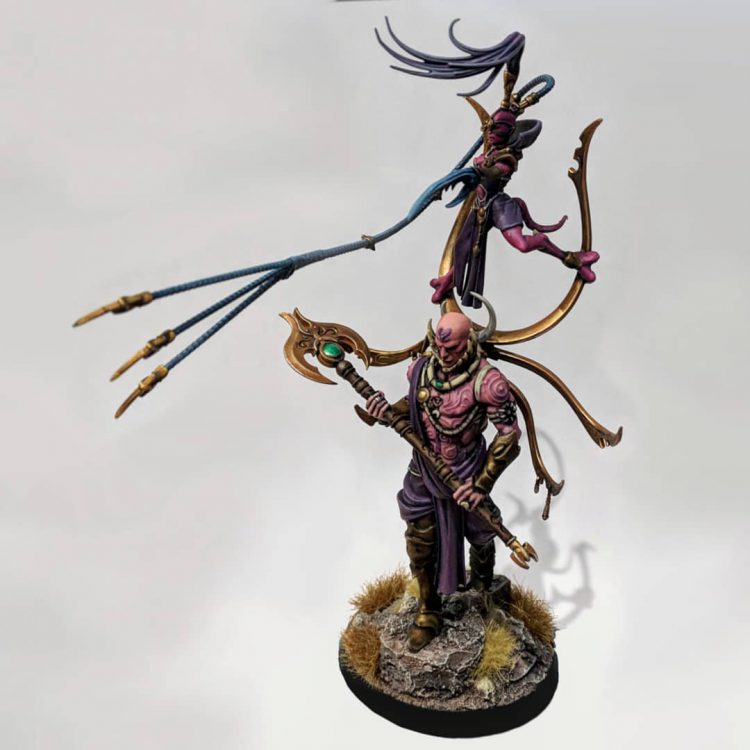
Now look – you obviously have to really want to take Daemonettes to do this because they are wildly overcosted, but if you’re going to then adding Syll’Esske is a decent shout. In contrast to the Daemonettes themselves, the dynamic duo feel pretty aggressively priced, and are a much, much nastier model to escort into enemy lines with a bodyguard than you normally get access to. A 9W model with good damage output and an invulnerable save getting back up on full wounds is a serious pain for opponents to deal with, requiring multiple phases of actual commitment to handle, and the damage output they represent is pretty decent as well. Firmly on the end of “do this if you want to do something unusual” rather than it being the best competitive play, but fun if Slaanesh is your jam.
Army Lists
Matthew Geyer – 4th Place – US Open Tacoma
Chaos demons
Belakor 325
Shalaxi Helbane 400
Blood thirster 300 great axe
Lord of change everstave rod of sorc 255
Lord of change dagger 230
Lord of change dagger 230
6 flamers 130
3 flamers 65
3 flamers 65
2000 points total
This showcases the option of just going tall and not worrying too much about anything beyond that. Three Big Birds unleash a terrifying sorcerous volley at range, a trio of lethal murder machines hunt the enemy, and Flamers fill out the roster.
Grant Kauffman – 4th Place – Palm Springs Open
Daemons v5 (2000 Points)
Chaos Daemons
Daemonic Incursion
Strike Force (2000 Points)
CHARACTERS
Be’lakor (325 Points)
Warlord
1x Betraying Shades
1x The Blade of Shadows
Great Unclean One (310 Points)
1x Bilesword
1x Plague flail
1x Putrid vomit
Enhancements: The Endless Gift
Lord of Change (255 Points)
1x Bolt of Change
1x Rod of sorcery
1x Staff of Tzeentch
Enhancements: The Everstave
Shalaxi Helbane (400 Points)
1x Lash of Slaanesh
1x Pavane of Slaanesh
1x Snapping claws
1x Soulpiercer
The Changeling (75 Points)
1x Infernal Flames
1x The Trickster’s Staff
BATTLELINE
Nurglings (40 Points)
3x Diseased claws and teeth
Nurglings (40 Points)
3x Diseased claws and teeth
Nurglings (40 Points)
3x Diseased claws and teeth
Nurglings (40 Points)
3x Diseased claws and teeth
Plaguebearers (145 Points)
1x Plagueridden
1x Plaguesword
9x Plaguebearer
9x Plaguesword
OTHER DATASHEETS
Flamers (65 Points)
1x Pyrocaster
1x Flamer mouths
1x Flickering Flames
2x Flamer
2x Flamer mouths
2x Flickering Flames
Flamers (65 Points)
1x Pyrocaster
1x Flamer mouths
1x Flickering Flames
2x Flamer
2x Flamer mouths
2x Flickering Flames
Flamers (130 Points)
1x Pyrocaster
1x Flamer mouths
1x Flickering Flames
5x Flamer
5x Flamer mouths
5x Flickering Flames
Flesh Hounds (70 Points)
1x Gore Hound
1x Burning roar
1x Collar of Khorne
1x Gore-drenched fangs
4x Flesh Hound
4x Collar of Khorne
4x Gore-drenched fangs
This build adds some more utility tools like Nurglings to screen, Plaguebearers and The Changeling to secure objectives, and a Great Unclean One to really secure an objective.
Wrap Up
That’s it for today, and best of luck conquering the mortal world. Tomorrow, we’ll flip back over to the Imperium side of things to take a look at Deathwatch.
